It is always a good practice to keep a class tree in the primary schools and in kindergartens. In general, a class tree is a tree like structure on which all the kids photos in the class are attached to its branches. This tree can be used as a symbolic representation of different groups present in the class based on seating arrangements. It will be a memorable experience for the kids and the class teacher. It will instantly bring a smile on the kid’s face whenever the kid look at his photo on a nicely decorated tree.
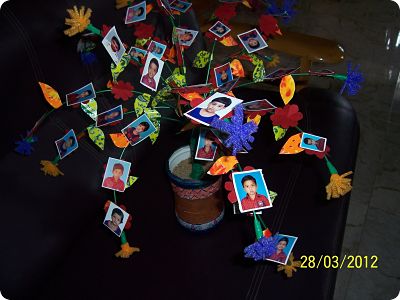
Recently I had an opportunity to make one such class tree for my daughter’s class. I wanted this tree to be very simple and colorful unlike any traditional class tree where green and brown dominates the tree.
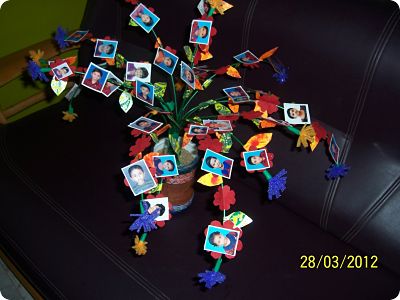
Below is my version of the Class Tree.
Instructions:
1. For the branches, I used few wires of different lengths which I have bought from a hardware store. Since I opted for an insulated type, that too with the green color outer layer, there was no need for me to cover the branches with the green color tape or paper. This saved me a lot of time.
2. Cut out a lot of leaf shapes from bright colored packing papers. Pasted these leaves on the branches with the help of glue.
3. Covered the ends or tips of the wire using a flower made from foam sheets.
4. Cut out several flowers from a red colored crepe paper and glued them on to the branch here and there. Made sure that I had plenty enough to attach each photo on a separate flower. Added few more on the remaining places.
5. Created a pot from an empty can from the kitchen and filled it with sand. Tied all the branches together with the help of a tape and inserted deep into the sand.
6. Painted the pot with some bright colors. That’s all. A bright and colorful Class tree is ready.

